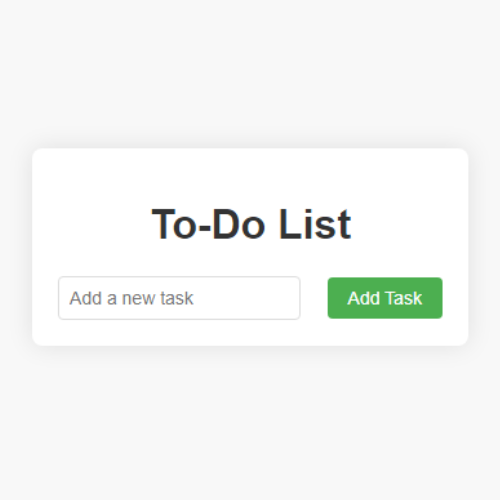
Building A To-Do List Tool With Html, Css, And Javascript

In today's hectic world, productivity is contingent upon upholding order. Making use of a to-do list is a helpful strategy for improving productivity and managing tasks. The trifecta of web development—HTML, CSS, and JavaScript—will be demonstrated in this article along with how to use them to create a dynamic to-do list application.
HTML Structure:
To start building our to-do list tool, let's set up the HTML structure. We'll create a container for the entire application, a section for displaying tasks, and an input field with a button for adding new tasks.
<!DOCTYPE html>
<html lang="en">
<head>
    <meta charset="UTF-8">
    <meta name="viewport" content="width=device-width, initial-scale=1.0">
    <link rel="stylesheet" href="styles.css">
    <title>To-Do List</title>
</head>
<body>
    <div class="container">
        <h1>To-Do List</h1>
        <div id="task-container">
            <ul id="task-list"></ul>
        </div>
        <div id="add-task-container">
            <input type="text" id="new-task" placeholder="Add a new task">
            <button onclick="addTask()">Add Task</button>
        </div>
    </div>
    <script src="script.js"></script>
</body>
</html>
CSS Styling:
Now, let's enhance the visual appeal of our to-do list by adding some CSS styles. We'll focus on creating a clean and user-friendly interface.
body {
    font-family: 'Roboto', sans-serif;
    background-color: #f8f8f8;
    margin: 0;
    display: flex;
    justify-content: center;
    align-items: center;
    height: 100vh;
}

.container {
    text-align: center;
    background-color: #fff;
    padding: 20px;
    border-radius: 8px;
    box-shadow: 0 0 20px rgba(0, 0, 0, 0.1);
}

h1 {
    color: #333;
}

#task-container {
    margin-top: 20px;
}

ul {
    list-style-type: none;
    padding: 0;
}

li {
    display: flex;
    justify-content: space-between;
    align-items: center;
    border-bottom: 1px solid #ddd;
    padding: 12px 0;
}

li:last-child {
    border-bottom: none;
}

.completed {
    text-decoration: line-through;
    color: #888;
}

#new-task {
    padding: 8px;
    margin-right: 8px;
    border: 1px solid #ddd;
    border-radius: 4px;
    font-size: 14px;
}

#add-task-container button {
    padding: 8px 16px;
    background-color: #4caf50;
    color: #fff;
    border: none;
    border-radius: 4px;
    cursor: pointer;
    font-size: 14px;
}

#add-task-container button:hover {
    background-color: #45a049;
}

button {
    margin-left: 8px;
    padding: 8px 12px;
    font-size: 12px;
    cursor: pointer;
}

button:hover {
    background-color: #ddd;
}
JavaScript Functionality:
The magic happens when we add JavaScript to make our to-do list dynamic. We'll implement functions for adding tasks, updating the task list, marking tasks as completed, and deleting tasks.
// Array to store tasks
let tasks = [];

// Function to add a new task
function addTask() {
    const newTaskInput = document.getElementById("new-task");
    const taskText = newTaskInput.value.trim();

    if (taskText !== "") {
        const task = { text: taskText, completed: false };
        tasks.push(task);
        updateTaskList();
        newTaskInput.value = "";
    }
}

// Function to update the task list in the HTML
function updateTaskList() {
    const taskList = document.getElementById("task-list");
    taskList.innerHTML = "";

    tasks.forEach((task, index) => {
        const listItem = document.createElement("li");
        listItem.innerHTML = `
            <span class="${task.completed ? "completed" : ""}">${task.text}</span>
            <button onclick="toggleCompleted(${index})">${task.completed ? "Undo" : "Complete"}</button>
            <button onclick="deleteTask(${index})">Delete</button>
        `;
        taskList.appendChild(listItem);
    });
}

// Function to toggle the completed status of a task
function toggleCompleted(index) {
    tasks[index].completed = !tasks[index].completed;
    updateTaskList();
}

// Function to delete a task
function deleteTask(index) {
    tasks.splice(index, 1);
    updateTaskList();
}

// Initial update of the task list
updateTaskList();
Best wishes! You've successfully used HTML, CSS, and JavaScript to construct a dynamic to-do list utility. With this straightforward but effective program, you can increase your productivity and maintain organization. Please feel free to further alter the styles and functionalities to suit your own requirements and tastes.